Lafferty Equipment Manufacturing, LLC

Installation & Operation Instructions

Model # 927107 · Electric 1.5 PD Solvent Sprayer

Requirements

Ready-to-Use Chemical Solution
Temperature up to 160°F
Hose 1/2" ID x 50'
Nozzle 2515
Electric 120V

Options

Stainless Steel Hose Racks
Small Stainless Steel Hose Rack# 224145
927107
Warning! Read All Instructions Before Using Equipment!

Overview

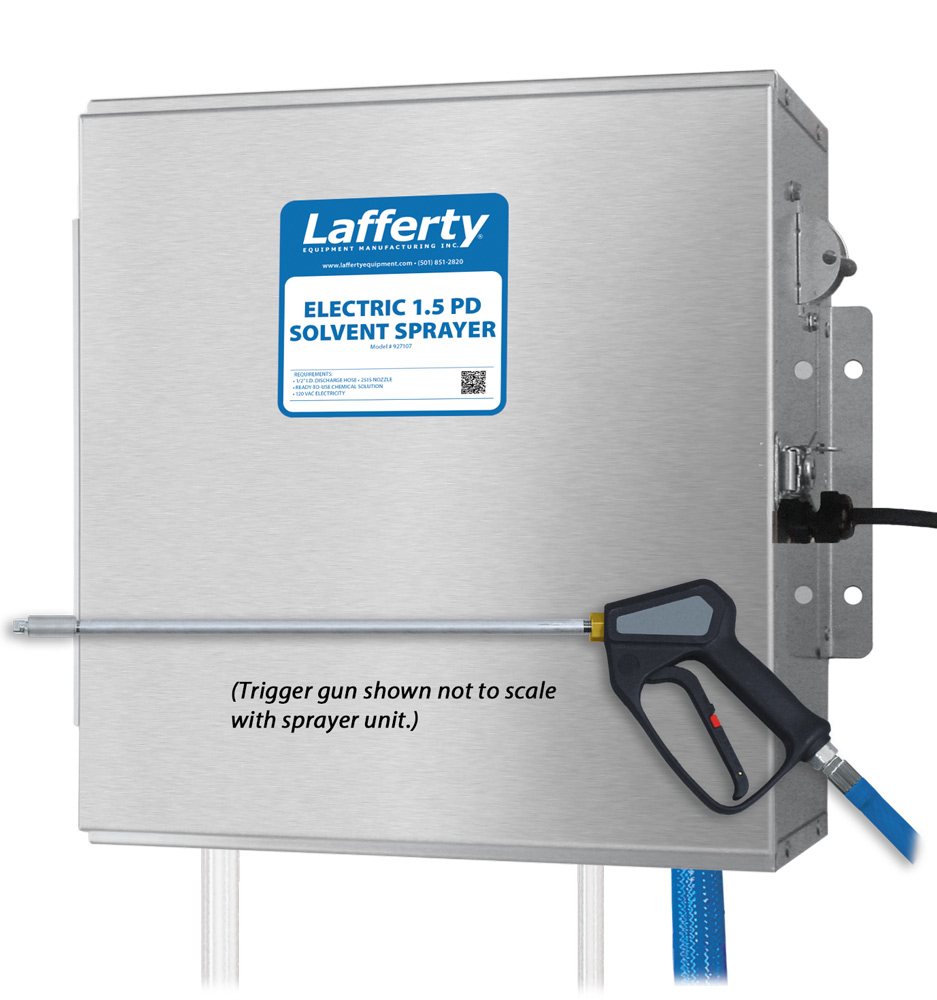
The Electric 1.5 PD Solvent Sprayer is a spray applicator for projecting pre-diluted or neat chemical solutions at 1.5 GPM. An electric pump, with Nylon body and Geolast diaphragms for chemical compatibility, draws solution from a static container and provides the pressure to project the solution as a fan pattern spray on to any surface.

Safety & Operational Precautions

  • For proper performance do NOT modify, substitute nozzle, hose diameter or length.
  • Manufacturer assumes no liability for the use or misuse of this unit.
  • Wear protective clothing, gloves and eye wear when working with chemicals.
  • Always direct the discharge away from people and electrical devices.
  • Follow the chemical manufacturer's safe handling instructions.
  • NEVER mix chemicals without first consulting chemical manufacturer.
  • Operate the electric pump according to the limitations specified on the data label.
  • Do not use with flammable or hazardous fluids not compatible with the Nylon pump housing and Geolast diaphragms. 
  • Always consider electrical shock hazard when working with and handling electrical equipment. If uncertain, consult an Electrician. Electrical wiring should only be done by a qualified Electrician per Local and State Electrical Codes.

To Install (refer to diagram on next page)

  1. Do NOT connect to electricity yet.
  2. Mount the unit to a suitable surface above the chemical solution supply to prevent siphoning.
  3. Connect the discharge hose as shown in the diagram.
  4. Insert chemical solution suction tube into a container of ready-to-use chemical.

To Operate

  1. With trigger gun in hand flip the switch to the on position.
  2. Pull the trigger gun to begin application.
  3. When application is completed, release the trigger.
  4. Flip the switch to the off position when not in use.
  5. Pull the trigger to relieve pressure in hose.
927107.png
Troubleshooting Guide
Problem Possible Cause / Solution
StartupMaintenance
A) Unit will not pump solution
D) Will not draw chemical
E) Unit doesn't come on when when button is pushed.
1,2,3
1,2,3
4
5,6,7,8
5,6,7,8
5,6,7,8
Possible Cause / Solution
StartupMaintenance
  1. Power not on or trigger gun not completely open
    • Completely open trigger gun.
    • Electric problems, ensure unit is plugged in (GFI recommended)
  2. Chemical tube not immersed in chemical solution or chemical depleted
    • Immerse tube or replenish.
  3. Discharge hose kinked
    • Straighten the hose.
  4. May have electrical problems
    • Ensure circuit breaker (5 Amp) has not been tripped.
    • Have a qualified electrician check electrical connections.
  1. Chemical strainer
    • Clean or replace chemical strainer
  2. Chemical tube stretched out or pin hole/cut in chemical tube
    • Cut off end of tube or replace tube.
  3. Vacuum leak in chemical pick-up connections
    • Tighten the connection.
  4. May have pump problems
    • Refer to pump manual.
PREVENTIVE MAINTENANCE: When the unit will be out of service for extended periods, place chemical tube(s) in water and flush the chemical out of the unit to help prevent chemical from drying out and causing build-up. Periodically check and clean chemical strainer and replace if missing.